Introduction

Creating a winning digital strategy for your business can seem like a daunting task. But by focusing on creating a plan that encompasses all aspects of your business online presence, you’ll be able to improve your chances of success online. This means developing a strategy for website design, SEO, social media marketing, and email marketing. By taking the time to create a well-thought-out digital strategy, you’ll be able to reach your target audience more effectively.

What is a digital strategy and why does your business need one

A digital strategy is a plan that outlines how your business will use digital media to achieve its marketing and business goals. It’s important to have a digital strategy in place because without one, you’re likely to waste time and money on ineffective online marketing activities.

There are many reasons why your business needs a digital strategy. Some of the most important ones are:

1. improved ROI: When you have a well-thought-out digital strategy in place, you’ll be able to see a better return on investment (ROI) for your online efforts. This means you’ll be able to get more out of your marketing dollars and achieve better results.

2. increased brand awareness: A digital marketing strategy will help to increase brand awareness for your business. This can lead to more website visitors, higher conversion rates, and improved sales of your products or services.

3. better customer/client engagement: A digital strategy can also help you to better engage with your customers. By interacting with them on social media, responding to their emails, and providing them with useful content, you’ll build stronger relationships that will last.

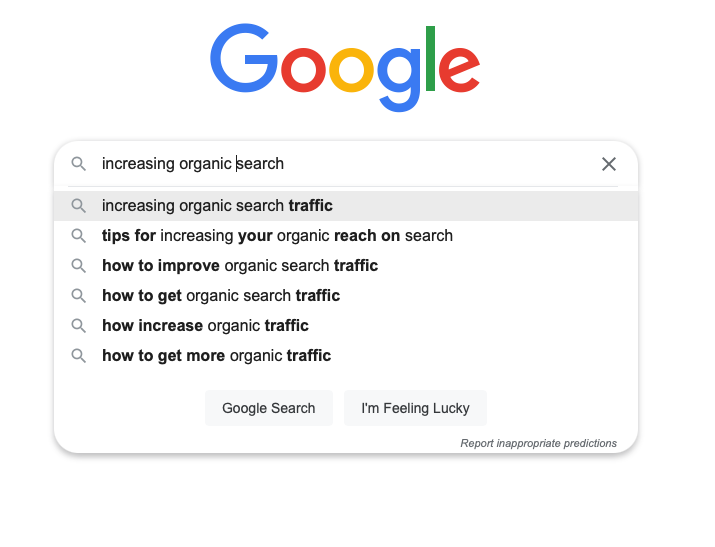
4. improved search engine ranking: If you want your website to be seen by potential customers, then you need to make sure it’s ranking well in the search engines. A good digital strategy can help you achieve this by optimizing your website for the right keywords and phrases.

5. increased web traffic: All of the benefits of a successful digital strategy will lead to one thing – increased web traffic. By getting more people to visit your website, you’ll be able to reach your goals and grow your business.

It’s essential for any business that wants to succeed online. By taking the time to develop a plan and implement it correctly, you’ll be well on your way to achieving success.

How to make a digital strategy for your business 

1. Define your business goals and target audience

  • The first step in a digital strategy is to define your business goals.
  • What do you want to accomplish with your online presence?
  • Do you want to increase brand awareness, generate leads, or drive sales?
  • Once you’ve defined your goals, you can start thinking about how to best reach your target audience.

2. Research your competition

Part of developing a successful digital strategy is understanding what your competition is doing. Look at their website, digital presence, and digital marketing campaigns. See what’s working well for them and what isn’t. You can then use this information to make sure your own strategy is better.

3. Create buyer personas

Another important part of developing your digital strategy is creating buyer personas. Buyer personas are semi-fictional representations of your ideal customer. They help you understand your target audience better so you can produce content and campaigns that appeal to them.

4. Develop a content strategy

Your digital strategy should include a content strategy. This is because content is one of the most important elements of any online marketing campaign. It’s what will help you attract and engage your target audience. When developing your content strategy, think about what kind of content you want to produce and how often you’ll need to create it.

5. Create a social media strategy

Social media is another important part of any digital strategy. After all, it’s one of the best ways to reach your target audience and promote your content. When creating a social media strategy, consider which platforms you want to focus on and what kind of content you’ll share.

6. Develop an SEO strategy

SEO is also critical for any digital marketing strategy. After all, it’s what will help you get found online by your target audience. When developing an SEO strategy, research the keywords your target audience is using and make sure to include them in your website content and social media posts.

7. Create a lead generation strategy

If one of your goals is to generate leads, then you’ll need to create a lead generation strategy. This can be done through a variety of methods such as gated content, contests, and free trials.

By following these tips, you can create a digital marketing strategy that will help you achieve your business goals. Remember to keep track of your results so you can adjust your strategy as needed.

Tips for executing your digital strategy successfully

When it comes to executing your digital strategy, there are a few things you need to keep in mind. Here are some tips to help you get started:

  1. Make a budget: One of the most important aspects of any digital marketing campaign is creating a budget. This will allow you to allocate the right amount of money to the right areas and achieve the best results.
  2. Be consistent: In order for your digital strategy to be successful, you need to be consistent with your efforts. This means publishing fresh content, interacting with customers on social media, and optimizing your website for the search engines.
  3. Track your progress: It’s important to track your progress throughout the execution of your digital strategy. This will help you to identify what’s working and what’s not so you can make necessary adjustments.
  4. Be patient: Don’t expect overnight results from your digital marketing campaign. It takes time to build up momentum and see results. Be patient and continue to work hard on your strategy and you’ll eventually see the fruits of your labor.
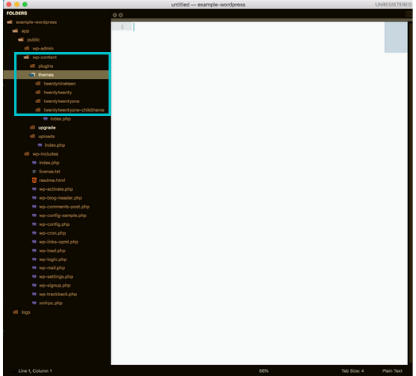
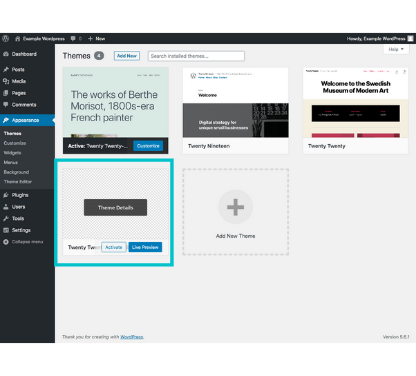
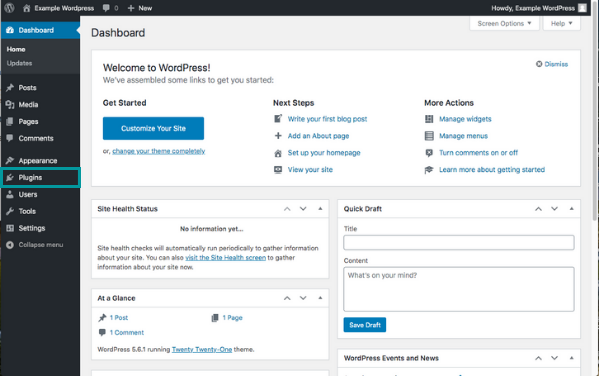
  5. Create a website that supports your goals: Your website should be the focal point of your digital strategy. It’s the first place potential customers will visit, so it’s important to make a good impression. Make sure your website is well-designed, informative, and easy to navigate. If you’re selling products or services online, your website should also be optimized for e-commerce.
  6. Invest in SEO: Search engine optimization (SEO) is a key part of any digital marketing strategy. It’s the process of improving your website’s visibility in search engine results pages (SERPs), which will help you attract more visitors from organic search traffic. To improve your SEO, start by conducting keyword research to find the right keywords to target. Then, focus on creating high-quality content that includes those keywords, and promoting your content across the web.
  7. Use social media effectively: Social media is a powerful tool that can help you achieve a variety of marketing goals, from increasing brand awareness to generating leads and sales. However, social media can only be effective if it’s used correctly. Start by creating profiles on the social networks that are most relevant to your business. Then, post regular updates, interact with your followers, and run paid ads.
  8. Send targeted emails: Email marketing can be a great way to stay in touch with your customers and prospects while also promoting your products or services. However, simply sending mass emails is not enough. You need to segment your email list and send targeted messages that are relevant to each group of recipients. You should also experiment with different types of email content, such as coupons, product announcements, and educational articles.

By following these tips, you’ll be well on your way to executing a successful digital strategy for your business. Just remember to be patient, consistent, and track your progress along the way.

Conclusion

If you’re feeling overwhelmed by the task of creating a winning digital strategy for your business, don’t worry. By breaking the process down into smaller steps and focusing on each area of your online presence, you’ll be able to develop a plan that helps you reach your target audience more effectively. I’m here to help guide you through the process every step of the way.

So if you’re ready to take your business to the next level, contact me today for a free consultation!

contact me

post image for 6 Places You're Making a Fatal Website Design Mistake

The Internet is a vast world of information. There are countless websites out there, so it’s natural that we all make mistakes and slip up occasionally. Check out this article about how When it comes to website design, how can you know for sure if your site is on the right track? The answer lies in checking for these six common fatal website design mistakes:

  1. Not having a clear call to action
  2. Not using enough white space
  3. Too many fonts on one page
  4. Poorly placed navigation buttons
  5. Using too much text in your design 
  6. Not making the website responsive for mobile devices

Check out this previous article

Not having a clear call to action.

One of the essential things for any website is a clear call to action. A visitor should know what they are supposed to do when visiting your site, and it’s up to you as the designer or owner of that site to make sure this message comes across loud and clear with a prominent CTA button on any page you want your customer to land on.

But not all calls to action are equal. Most people spend so much time trying to craft the perfect message to promote their product or service, yet they fall short of winning. That is because the call to action needs to tell the reader what to do, and it needs to be motivating enough for the reader to take the action you want them to do. 

A general rule for a call to action is typically five to seven words, but that can vary. A call to action should concisely get the point across and not include unnecessary information such as how you found out about this article or what your opinion on it may be.

Here are five popular calls to action formulas used and are effective:

  1. Order your _______ today!
  2. Get started now!
  3. Start your free ________ now!
  4. Get your free _______ today!
  5. Try it free for ______!

Not using enough white space.

White space is essential to give the user a break from reading and makes it easier for them to skim your content. White space also helps with how readable text is, even when there are not many words per line.

A good rule of thumb is that you should use at least one more inch of white space than you have text on each page or screen.

White space, also known as negative space, can be described as an area on a webpage that has nothing but blank or empty background. White space allows for easier reading and skimming of your content because it gives users’ eyes a break from the constant text.

A trick that can help eliminate or break up large blocks of content is summarizing them and using them as bullet points.

Too many fonts on one page

Using too many fonts on one page can be distracting for the reader, and it is usually an indication that you are using this technique to make your text more interesting.

While there’s nothing wrong with changing font styles every so often, especially in larger chunks of content, too many fonts can be devastating. If you have too many different fonts on a single page or screen, then they may start competing against each other as well as from what people have initially been looking at when they came to your website. This will confuse readers in which case could result in them leaving without taking any action.

The best solution is to use a maximum of two fonts per webpage unless there is a good reason not to do so (such as conveying multiple moods). It would be best to remember that readability and consistency are most important for anyone looking at your website.

Bad website Navigation

Good website navigation is crucial for any site. Whether it’s a simple blog, an e-commerce store, or anything in between, your visitors need to be able to find the information they’re looking for as quickly and efficiently as possible.

Here are three quick ways to improve your navigation:

  1. Stay away from generic wording such as “services” and “products.” It is best to use descriptive words that describe the contents of the page. 
  2. Try to limit how many pages you have on the navigation bar. Having too many navigation tabs can overwhelm and distract them from the reason they went to your website in the first place.
  3. As creative and unique as you want to be, sometimes sticking with the nor can yield significant benefits. Sticking to a horizontal nave bar above the page is something that many people expect to see and is often the first place on the screen they look at while visiting. 

Also, when you have large blocks of content on a page without links anywhere nearby, then your visitor will spend time scanning back and forth until they finally find one that jumps out at them. This can lead people to get frustrated with your site because what should only take seconds ends up taking minutes – which means less traffic on your site overall.

Using too much text in your design 

For websites with a lot of text, the content can often be too dense and overwhelming. This is especially true for users on mobile devices who are scrolling through your website with their fingers rather than clicking to jump around. Your audience may not have time to read all that information in one sitting, so they’ll get frustrated when you don’t shorten your text or highlight essential words to help readers find the answers your reader is looking for. Try breaking up some of those long paragraphs into smaller chunks instead of packing it altogether if you want people to read through what’s there!

Not making the website responsive for mobile devices

More and more people are using their mobile devices to browse the web. Statista reported that as many as 54% of all Internet traffic is from a mobile device! 

But not everyone has access to, wants to be on their computer, or is on the go, so they can’t enjoy your site’s design on such a large screen. That means you’ll be excluding half of your audience if you don’t make sure that it looks good for any size device! You should test how your website works on different computers (desktops, laptops) with varying resolutions and monitor sizes; this will help ensure that the content gets delivered correctly no matter what kind of machine someone is viewing with.

Conclusion 

A website is an essential part of marketing your business. However, it can be challenging to know if you are on the right track with web design when there are so many websites out there. One way to ensure that your site looks great and functions well is by checking for these six common mistakes. Have you been making any of these website design mistakes? 

Subscribe

* indicates required

How to Make Your Website SEO-Friendly cover photo

We all know how important it is to make our website SEO-friendly and the only way to do it is by increasing organic search ranking. The days of stuffing keywords and paying for ads are long gone, but that doesn’t mean we stop looking out for ways to improve the search engine ranking of our site. One way is by making sure you have a mobile-friendly design, and another one is by optimizing your WordPress blog posts for organic search engines.

Use keywords in your blog post title.

It’s essential to include a targeted keyword in your blog post title if you are thinking about increasing organic search ranking. By doing this, Google may rank you higher for that term because it is more likely to be relevant and helpful content. Ensure not to stuff keywords or use them unnecessarily, though – the key is using targeted keywords appropriately.

Here is a tip, according to Wordstream, “50% of search queries are four words or longer.”

Search queries or keywords that are four words or longer are called long-tail keywords. Long-tail keywords tend to be more effective because it shrinks the competition to be on Google’s first page. 

For example:

instead of wanting to make my title for this article “Tips on how to use SEO.”

SEO already has a saturated market full of websites trying to compete for ranking high for SEO.

This is why narrowing it down with long-tail keywords becomes effective. 

“How to Make Your Website SEO-Friendly: Tips for Increasing Organic Search Ranking”

“Make your website SEO-Friendly” and “Increasing Organic Search Ranking” are forms of long-tail keywords that can boost my SEO and decrease competition. 

The easiest way to find forms of long-tail keywords is with the Google search bar. 

image of using google search bar to find keywords
Image of using Google Search to find long-tail keywords.

Although keywords are important, It is much more important to think of the reader first and then think keywords.

Add meta descriptions to each blog post.

Meta descriptions tell Google what your blog post is all about. The descriptions are essential for helping Google stay relevant with what readers are googling. It’s necessary for search engine optimization because this description can show when someone does an internet search, and it also appears as the snippet on SERPs (Search Engine Results Pages).

The meta descriptions should include targeted keywords but don’t overstuff them, or you will risk being penalized by Google.

The general rule for writing meta descriptions is:

  • Don’t focus too much on character count and focus more on describing to the searcher what your article is about. 
  • Draw interest to the person seeing your description. Starting with a question is always a great way to create interest because a question helps lead the reader into wanting to read more. 
    • Ex: “Do you want more traffic? this article will give you insight on how to increase organic search traffic by making your website SEO-friendly.”
  • Use your keywords. I used the two long-tail keywords that I want to rank for in the meta description as shown above. Always use the two long-tail keywords in your description that you also use in your title. 
  • This rule is essential, DO NOT DUPLICATE your meta description. Duplicating descriptions is one of the common reasons why Google penalizes websites. Every meta description should be unique and never the same. 

Include a keyword-rich header tag 

Header tags are for headings and sub-headings.

header tags consist of 

H1, H2, H3, H4, H5, H6

The most common tags used are H1, H2, and H3. Due to many websites getting in trouble for not being ADA compliant, It’s important to use tags consistently. 

For example, H1 should always be the page title. H2 should be used for page title sub-headings or page headers. H3 are for sub-headings for page headers.

When it comes to SEO, one of the most important things is your metadata. That’s why you need to include keywords and keyword phrases in as many header tags as possible – tags.

Create an XML sitemap for search engines to index your website more efficiently.

An XML sitemap is a file that lists all of the metadata of your page on your website that helps with increasing organic search ranking. This will help search engine crawlers index your site more efficiently, which in turn improves your organic rankings for those keywords and phrases you want to rank higher!

With WordPress, access to your XML site is easy to do. All you need to do add wp-sitemap.xml at the end of your domain. 

ex: mywebsite.com/wp-sitemap.xml

In 2020, WordPress added this feature for version 5.5. 

Make sure you have the correct tags and categories set up on WordPress

If you are new to blogging, there is a lot of information on setting up tags and categories to make your site more search-engine friendly. Google has an excellent resource for this as well!

Don’t forget that good content with proper formatting will rank higher in the SERPs than spammy articles or poorly formatted ones without.

Categories are parent topics for your posts. You can use them to organize the content on your site, like a table of contents in an e-book or magazine. 

Categories help you group all their posts, so it’s easy to find what you’re reading are looking for. Use categories at different levels – main level ones will contain other more specific terms that may apply only under certain circumstances, such as “business,” which has blog entries about work experiences. Sub-categories are for topics related to another topic.

Category: 

  • Website

Sub-Catagory: 

  • WordPress
  • SEO
  • Page-builders

Tags are to describe specific details of your posts. Think of these as the index words for your site’s content, letting you micro-categorize it at will. Tags can not be hierarchical in any way; they’ll appear with related tags next to them, like on social media sites such as Tumblr and Facebook if users have search options enabled or follow tags that match what is being searched. 

Write posts with content relevant to your site’s topic, not just filler text or spammy links.

according to Google, spammy articles is defined as:

“A rich result may be considered spam if it harms the user experience by highlighting falsified or misleading information. For example, a rich result promoting a travel package as an Event or displaying fabricated Reviews would be considered spam.”

Google has been cracking down on websites with spammed articles, and if you want to avoid being penalized by the search engine giant, make sure your posts are full of quality content. Of course, I doubt this is you. 

But once again, it is essential to highlight the relevance of your content.

For example, an article about a new phone case won’t do well if it has a misleading title. One of the best ways to show relevancy is by including keywords in your title or introduction paragraph and then linking them with related posts for relevant readers.

Conclusion

These WordPress SEO tips should give you a headstart in increasing organic rankings for your website!

If you want to maximize your website’s visibility in search engines, make sure it is mobile-friendly and that you are optimizing WordPress blog posts for organic search. This will not only help with the SEO of your site but also increase traffic. Contact us today to learn more about how we can start improving your website’s exposure on Google!

Feature image for the need to know about wordpress child themes

In this article, I hope that I clarify the idea about WordPress child themes, the uses of a child theme, and how to create a child theme. 

this out a doubt, the most common questions clients asked me about WordPress child themes are: 

  • What is a WordPress child theme?
  • When do you need to create a WordPress child theme?
  • Why do you need a child theme?
  • What are some of the advantages and disadvantages of a child theme?
  • How to create a child theme?

What exactly is a child theme

A WordPress child theme is a WordPress theme that inherits the functionality and style from a parent theme. WordPress created the ability to create a child theme. Because any customization or functions added to a theme would be erased or could break the website whenever the user would have to update. An update is essential for security and the prevention of others hacking into your site. 

With a child theme, you can keep the customization done to your theme and continue to update your parent theme without losing your work or being available to hackers. 

This is the most significant benefit of having a child theme.

To learn more on how to customize your WordPress website. This article will help you achieve the design you want.

THIS IS HOW TO USE ADDITIONAL CSS BOX IN WORDPRESS

Why and When should you use a WordPress child theme?

Using theme frameworks helps designers and developers decrease the production time for creating a website that meets the clients’ needs. There are few occasions when creating a theme from scratch is beneficial, but it is unnecessary in most cases. 

Suppose users are going to customize and make tweaks to there CSS or functions of their WordPress site. In that case, requiring a theme to have a child theme is necessary not to lose your work when you update your parent theme. But if you are going to stay within the limits of the theme’s features, a child theme may no be necessary but would still be a good idea to do anyway. 

On top of everything else, another reason why using a child theme is great to have is because it acts as an extension to the parent theme. The user or developer can create a header.php, footer.php, templates, JavaScript, and CSS file and not worry about affecting the parent WordPress theme. Theoretically, the user can have more files than the parent theme and not worry about losing your work when updating. But if this is the case, I would recommend finding a parent theme with the functionality you need. 

What are the advantages and disadvantages of using a WordPress child theme? 

The advantages of using a child theme are

  • You can safely update your theme regularly.
  • Creating a child theme allows you to have the capability of creating a website that meets your exact needs.
  • It is excellent to have as a fallback just in case a custom functionality breaks. You can away go back to the original function. 

The disadvantages of using a child theme are:

  • There is often a kind of learning curve associated with the parent theme because each theme has its hooks and filters that make up the theme itself. 
  • Another disadvantage comes from the parent them. When dealing with clients’ WordPress websites where the framework’s developers abandon, I have run into many situations, lose interest in maintaining or get acquired by a different development company. 

How do you create a WordPress child theme? 

Fortunately, I have noticed a trend where themes are starting to come with their WordPress child themes attached. This is awesome because it saves you time.

But if a WordPress child theme is not available, then there are two popular methods to creating a WordPress child theme. 

  • Manually create a WordPress Child Theme through FTP or CPanel File Manager
  • Use a WordPress child theme plugin

Manually create a WordPress child theme.

locating the theme folder
  1. Either in your File Manager in your CPanel or through FTP, head to the Public_html > wp-content > themes folder. 

2. Create a new folder within that theme directory. I usually name the child theme after the parent them but attach the child theme afterward like in this example. I turn twentytwentyone into twentytwentyone-child. Do not use spaces for naming. 

3. Using a text editor like Sublime if you are using FTP or in your file manager’s text editor, create a file named style.css and add the following code. 

/* 
Theme Name: Twenty Twenty-One Child 
Theme URL: http://yourdomain.com
Description: This is the child theme of Twenty Twenty-One
Theme Author: Your Name
Author URL: http://yourdomain.com
Template: twentytwentyone 
Version: 1.0.0 
Text Domain: twentytwentyone-child 
*/

4. Make the necessary changes to the code to fit the child theme you are creating for yourself.

5. In the same directory, create a new file named functions.php and the following code inside the file.

<?php
add_action( 'wp_enqueue_scripts', 'enqueue_parent_styles' );
function enqueue_parent_styles() {
   wp_enqueue_style( 'parent-style', get_template_directory_uri().'/style.css' );
}
?>

6. After this, log in to your WordPress website and make your way to the themes page. If done correctly, you should see the WordPress child theme.

How to create a WordPress child theme using a plugin. 

Image of the WordPress dashboard
  1. Head to the Plugins page in your WordPress dashboard.
Image of the WordPress dashboard

2. From your plugin page, navigate to “add plugin.” For this example, in the search bar, type child theme. I will be using “Child Theme Generator” to create our WordPress child theme. Install and activate the plugin. 

WordPress plugin page showing Child Theme Generator

3. From the plugins page, locate the “Child Theme Generator” and click on the “Create” option. 

selecting the WordPress theme from the drop down menu

4. In the drop-down, locate the theme that you want to use to create the WordPress child theme. In this example, we are going to continue to use the Twenty Twenty-One theme.

filling in information to create the WordPress child theme

5. In the “Heading,” type the name you want to give your WordPress child theme. Here I typed “Twenty Twenty-One Child,” and for the “Description,” I placed a description about the child theme being created, “This is the child theme for Twenty Twenty-One Theme.” After you are done filling in the two fields, create the new child theme.

finalize the Child Theme installation and activation

6. Check the “Activate child-theme” box and then click the finished button.

preview of the WordPress Child theme

7. Go to the Themes page in your dashboard, and you should see the new child theme created and activated. 

Conclusion

I hope you now have a good grasp of the importance of a WordPress child when to use, the pros and cons, and how to create a child theme for your WordPress website. My goal for this article is to provide easy to consume knowledge about WordPress and Web Development. 

Please share if you found this article helpful!

contact me

featured image for how to use add css in the theme customizer

WHAT IS ADDITIONAL CSS BOX?

One of the features that make WordPress such an awesome framework is the Additional CSS Box located in the Customize menu. When using themes, there are some elements that cannot be changed and it can get frustrating because we all love to add a personal touch to our WordPress website. 

This blog, We will give you a brief lesson on

  • What do I need to Know
  • How to add CSS to the box
  • Guide through Dev Tools
  • What is !important

WHAT DO I NEED TO KNOW?

First off, If you know some CSS than congratulations! You can skip this part (link to section)

But if you do not know any CSS, then do not worry, this lesson will cover on only what you need to know.

CSS is a language used to design the frontend of the website, HTML is the bones and CSS is the physical features. And CSS uses a specific way to structure its code. for example:

.thisIsAClass { color: blue; }

Up above is the basic structure of the CSS code.  Down below show that CSS is created using three components. There is the selectorproperty, and value.

.thisIsAClass (selector) {
color (property): blue(value);
}

Not very intimidating right!

Thankfully, this concludes this part of the lesson. Straight forward and simple.

NOW LET’S MOVE ON TOO WORDPRESS

We are assuming that you practically know your way around WordPress.

So for this lesson, we will be using WordPress theme Twenty Nineteen as our sandbox. So first, let’s make our way to the Dashboard and select Appearance > Themes.

Wordpress dashboard showing the location of the themes page.

This will take you to the Themes page of WordPress and as you see we have the Theme Twenty Nineteen selected and activated

This is the Theme page in the WordPress Dashboard

Now here is a shortcut to the Homepage;

Hover over the Site Title, in this case. After you hover a drop-down menu will show “Visit Site”. Click on it and it will take you to the current or default Home Page.

Shortcut to the home page from the dashboard within WordPress.

Here you see the homepage. It is very basic but it will do.

We are going to first focus on the Hello World! heading of our WordPress website.

the homepage of WordPress Twenty Nineteen Theme

On the top of the page, you will see the Customize option. Click on the option to access the Customization Menu for the Website.

Image showing the location of the Customize option in the WordPress Menu bar

INTRODUCING THE CUSTOMIZATION MENU

This menu varies with different WordPress themes you will pick but all of them should have the Additional CSS tab. After clicking on the CSS tab, the Additional CSS Box will appear at the bottom.

Going back to the brief yet important example of how CSS works.

I bet your thinking “How do I know what selector to target?”

This is Google Dev Tools is the get to know tool for designers and developers because it can aid us in many situations. However, I’m going to use the Element inspect feature.

To access Dev Tools you must:

Mac: Command + Option + I

Windows:

Once Dev Tools is activated, be sure the Inspect Element icon is highlighted blue. While activated, you will be able to see all the elements that make the webpage look the way it does, from padding to marginsh1 to h6, and the div tags created. It’s pretty amazing to see.

This lesson we are going to change the color of the front black to blue.

So we dragged the pointer to the “Hello World” heading, after selecting the element, on the bottom of the page there is a line of selectors to choose from.

Once again don’t be intimidated, its best to start from the two or three selector groups from the right-hand side.

For example, there is:

header.entry-header h2.entry-title a

It is not shown but we first selected the group “h2.entry-title a” and there was no response. Afterward, we choose “header.entry-header” and the page title turned blue.

So in the Additional CSS Box, we entered the following code:

header.entry-header { color: blue; }

When finding the right selector to target. Enter the first selector you wish to try and if you get no response than keep the property and value entered and just change the selector.

We first entered:

h2.entry-title a {

color: blue;

}

(no response)

Afterward, we tried:

header.entry-header {

color: blue;

}

(color responded)

just changing the selector will save you time from entering and reentering the code in its entirety.

LET’S TRY ANOTHER

Now, we want to change the background of the website.

Repeating the steps from the previous section, we select the Inspect Elementfeature and select the header section (highlighted blue).

Now we try to find the selector to target the background which in this case is the following code:

main { background-color: black; } 

Then we change the font color from the previous code from black to white and we select the paragraph text of the section “div.entry-content” and change the font from black to white.

Which ultimately looks like this:

Understanding how the Additional CSS Box is very valuable to know. But you must also keep in mind that this is a simple page. When customizing your theme, you will run into some crazy looking selectors. Just keep in mind to be patient when learning how to customize.

Now there is one last thing to show.

THIS IS !IMPORTANT

The way WordPress CSS works is by a hierarchy. There are different ways to modify the CSS in WordPress, either through FTP, the Theme Editor, and the Additional CSS Box. The way we are showing you is the most recommended way to customize because it will prevent you from getting into a horrible situation. This will be explained late on a different blog.

but the reason I bring it up is that when you choose a theme and then introduce a page builder into the mixture, sometimes the hierarchy becomes scrambled so-to-speak.

Let’s say you want to trigger a selector but it is not changing. The !importantstatement gives that code priority over the hierarchy. but its always good practice to use it when needed because adding the statement can possibly through off other elements.

To use the !important statement, you simply add it to the right of the value and before the semicolon.

example:

div.entry-content { color: white !important; } 

Adding the !important to the value in the code will say this element is important and needs to be a top priority.

QUICK NOTE:

Its good practice to add comment statements above the css code that you create so that you can know what that code is for. It also helps for anyone who wants to change it later what css code does what in the website.

This what it should look like:

TL;DR

If you want to customize specific elements in your webpage that your theme will not offer, You can change it through the Additional CSS Box.

To get to the Additional CSS Box, go to the page that has an element that you want to change (e.g font, font size, color, background color, etc.) and activate the Customize option on the top of your page to the left.

The Customize menu will appear and at the bottom will be the Additional CSStab.

After selecting the Additional CSS tab, there will be an input area at the bottom.

Now, activate your Dev Tools and find the selector of the element. Input the selector {property: value; } of the element.

if you are not sure you picked the right selector or if there is a hierarchy issue with the element add the !important statement to the right of the value but before the semicolon.

ex

selector { property: value !important; } 

Once the element has changed, hit submit to save.

You dont have to go at it alone!

WordPress allows your website to come to life with a few CSS customization. If you want a website that is custom tailored to meet your business identity. fill out the contact form below. Your business deserves to make a great first impression to a world waiting to build a relationship with you.

contact me