I often hear that WordPress is the least secure website framework to use. It is the most hacked framework around only because it is the most used website. But the developers at Automatic, the company that owns WordPress, continue to look for a new way to maintain the integrity of the framework. Nothing is ever 100%. All website frameworks, such as Drupal, Squarespace, Wix, and more, are prone to be hacked.
But here is some good news!
There are ways to strengthen the security of your WordPress website. Here are the four ways that I use for the websites that I build on an everyday basis.
- Easy Hide Login
- Limit Login Attempts
- Wp Hide + Security Enhancer
- Malcare
Easy Hide Login
Easy hide login is a plugin from Arshid. What does this plugin do? WordPress has a standard way to reach the login page. You can either do www.example.com/admin or www.example.com/login; either way will redirect you to a WordPress website’s login page. This being the case, finding the login page is very easily accessible to hackers who want to run a Brut Force Attack. A Brute Force Attack is a script runner through a bot that will run 1000 user names and passwords in a minute, and it will keep doing this until it finds the right credentials. Installing this plugin will allow you to change the login page name. Instead of www.example.com/login, you can rename it to www.example.com/bet-you-cant-this-login or, even better www.example.com/6kj34oijm4k6. Creating a custom login page will make it a challenge for those pesky hackers trying to get in.
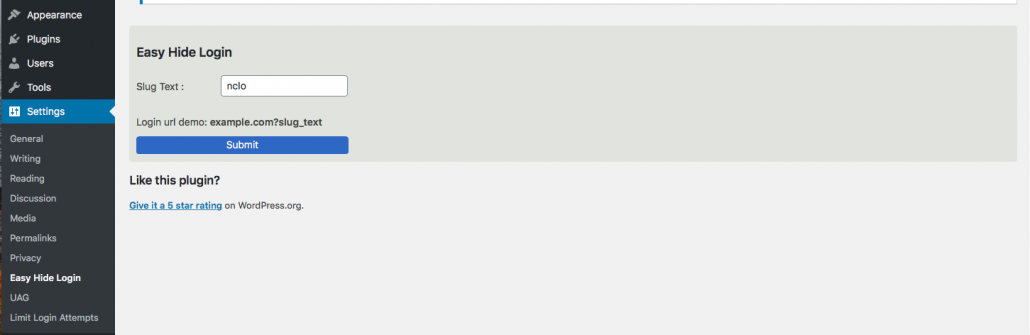
Installing this plugin is easy and straightforward to set up. Install the plugin and activate, then hover on the settings tab, and you will see Easy Hide Login. Click on the Easy Hide Login setting and change the name of the login URL.
plugin price: Free
Limit Login Attempt Reloaded
As mentioned above about a Brute Force Attack, let us say that a hacker can access your login page. Limit Login Attempts Reloaded comes in handy because it does like it’s named. You can set the limit of login attempts before the login page lockdown for 20 minutes or however long you set the parameter. That is the greatest thing about this plugin; it will record any IP addresses that try to force their way to pass the login.
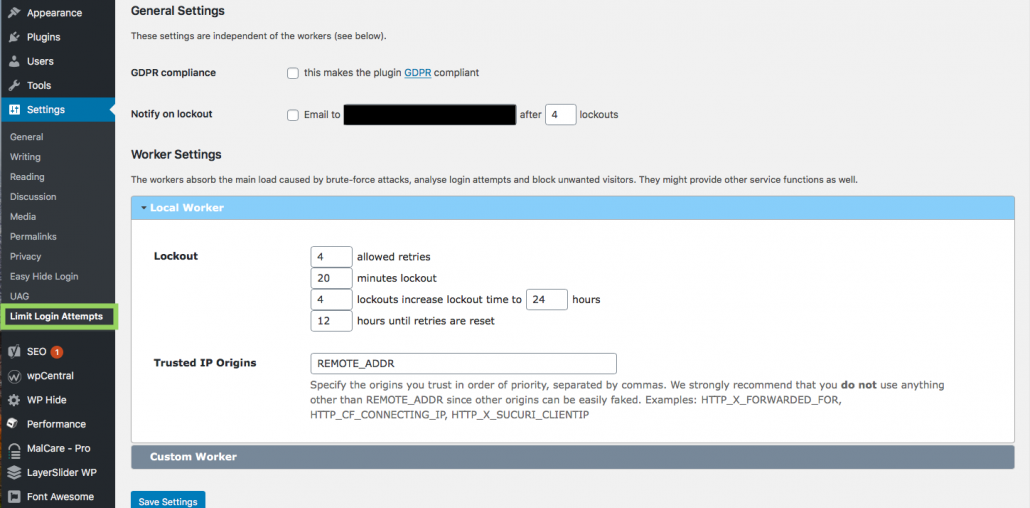
Once this plugin is installed and active, the plugin settings will be found in the admin dashboard settings tab. The settings for this plugin allows you to set the parameters that you want.
plugin price: Free
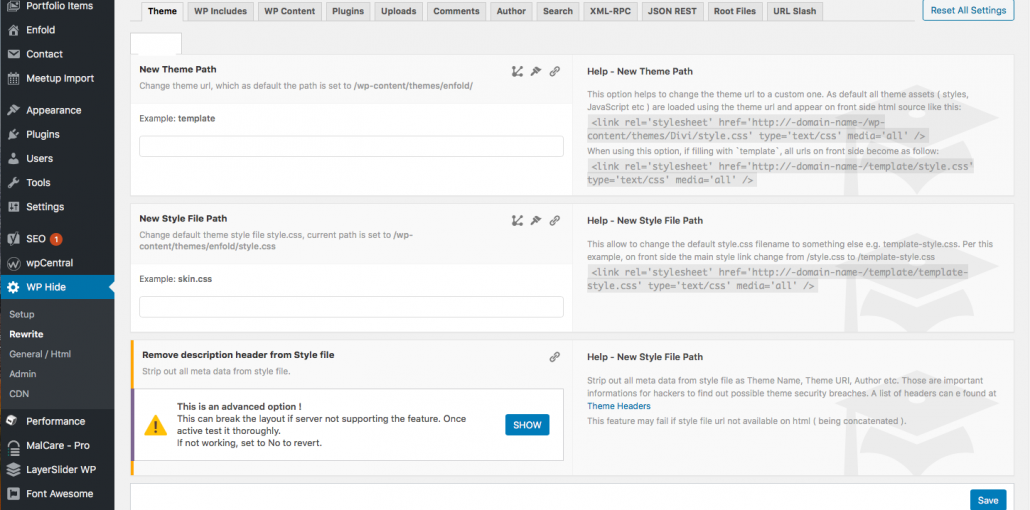
Wp Hide + Security Enhancer
Three folders are the primary goal of hacking into a WordPress website.
- wp-admin
- wp-includes
- wp-content
These three folders make up the WordPress framework, and every WordPress framework folder has these names as a default. You could change these file names through the backend, but you would need the experience to ensure that nothing in your WordPress website breaks after changing the names. Fortunately for you, there is this nifty plugin Wp Hide + Security Enhancer. This plugin allows you to change the folder, theme, and plugin file names by creating redirects in your .htaccess folder. By making the redirect links, the plugin overrides the default names with the new names. So instead of www.example.com/wp-content/themes, it changes it to www.example.com/my_assets/95jhojn6. The file name change will create an extra security level that will repel script attacks that try to gain access into these important folders to plant backdoors. You do have to be careful with this plugin because it might, and I mean on a rare occasion, will break your site, but this plugin will give you a recovery link.
If you change a folder name in the scenario and suddenly get a 404 page not found or a critical issue message, the recovery link will override the change.
Do not lose the recovery link!
On an honest note, I have only had one bad experience with this plugin, but it was my fault for breaking the site. I did not save that recovery link.
Overall, this plugin is essential because of the feature listed.
plugin price: Free
MalCare
Malcare is a subscription service that scans malware and cleans your website if there ever is an issue with your sight becoming hacked. The best thing about Malcare is the easy ability to harden security through the Malcare dashboard. The way it adds the extra protection is by:
- Block PHP Execution in Untrusted Folder: This action stops hackers from uploading malicious scripts if they gain access to your website.
- Locks the Theme editor: By default, admins can access the theme editor through the Appearance tab in the dashboard. Locking it to everyone, including admin, will block everyone, including hackers, from accessing the themes files.
- Blocks theme and plugin installation: Like the Block PHP function, This will lock the theme/plugin installer. The only way you would add new plugins and/or themes is by doing it directly through the Malcare dashboard.
- Changing security keys/ reset all passwords: Hackers gaining control of the wp-config.php is the equivalent of someone stealing the keys to the entire kingdom. Changing Security keys will prevent anyone from gaining control of your website database and WordPress framework.
Malcare is a paid service. However, some plugins will have some of the same features as Malcare, the two being notable are Securi and Wordfence. Both plugins have a free and pro version, but I learned that the free version would be sufficient if you start building yourself a website.
Conclusion
I take securing my client’s websites very seriously, and I hope that you do the same. Although nothing is ever 100% safe, minus some advanced techniques that I use, these four steps I take can be executed by you with ease and with a minimal learning curve to how to use these plugins.
Whether you have a website that is promoting your business or selling products using WordPress E-commerce, there are many reasons why websites are targeted by hackers. I go the extra distance to make sure what I am building is as secure as possible. If you have a business or are an influencer that needs a website, feel free to contact me!